Start with LED control projects to master digital output basics—blinking patterns and traffic light simulations teach you pin configuration and timing functions within your first hour. Wire up a temperature and humidity sensor next, learning to read analog inputs and display real-time data on LCD screens or serial monitors, giving you foundational skills for environmental monitoring systems.
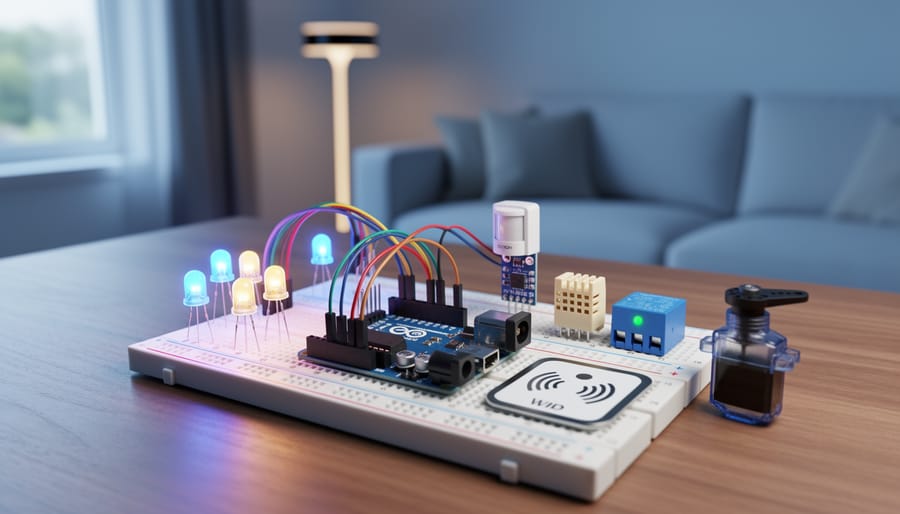
Build motion-activated lighting using PIR sensors and relays to automate your space while discovering how Arduino interfaces with higher-voltage devices safely. This project introduces you to practical home automation concepts without requiring complex programming knowledge. Progress to creating an RFID-based access control system that combines multiple components—readers, buzzers, and servo motors—to unlock doors based on authorized cards, demonstrating how Arduino powers real-world security applications.
Transform your Arduino into an IoT powerhouse by adding WiFi or Ethernet shields that connect projects to the internet. Remote monitoring systems, weather stations broadcasting to cloud platforms, and smartphone-controlled appliances become achievable once you understand HTTP requests and MQTT protocols. These connected projects position you at the intersection of electronics and modern smart home technology.
The beauty of Arduino lies in its flexibility—you’re not just following instructions but developing problem-solving skills transferable across countless applications. Each project builds on previous knowledge, creating a learning pathway from simple circuits to sophisticated networked systems. Whether you’re automating your home, monitoring your garden, or creating custom gadgets, Arduino provides the accessible entry point where imagination meets practical engineering.
Why Arduino Is Perfect for DIY Projects
Arduino has earned its place as the go-to platform for DIY electronics projects, and for good reason. Whether you’re taking your first steps into the maker world or you’re a seasoned developer expanding into IoT, Arduino offers a unique combination of benefits that keeps it at the forefront of the DIY movement.
First and foremost is affordability. Genuine Arduino boards start around $20-25, with compatible alternatives available for even less. This low barrier to entry means you can start experimenting without a significant financial commitment. When you factor in the minimal cost of basic sensors and components, you can build impressive projects on a tight budget.
The Arduino community is one of its greatest strengths. With millions of makers worldwide, you’ll find endless tutorials, forums, and shared code libraries for virtually any project you can imagine. Stuck on a problem? Chances are someone has faced the same challenge and documented their solution. This collaborative spirit makes learning faster and troubleshooting less frustrating, especially for beginners who might feel overwhelmed at first.
Versatility is another major advantage. Arduino boards work seamlessly with thousands of sensors, modules, and shields. Want to measure temperature, detect motion, control motors, or connect to WiFi? There’s a component for that, and it likely has Arduino-compatible libraries already written. This plug-and-play ecosystem means you can focus on creativity rather than low-level programming.
For IoT hobbyists specifically, Arduino remains incredibly relevant. Boards like the Arduino Nano 33 IoT and MKR WiFi 1010 offer built-in connectivity, making it simple to create smart home devices, environmental monitoring systems, or remote-controlled projects. The platform bridges the gap between simple electronics and connected systems, letting you grow your skills progressively while building increasingly sophisticated IoT applications.
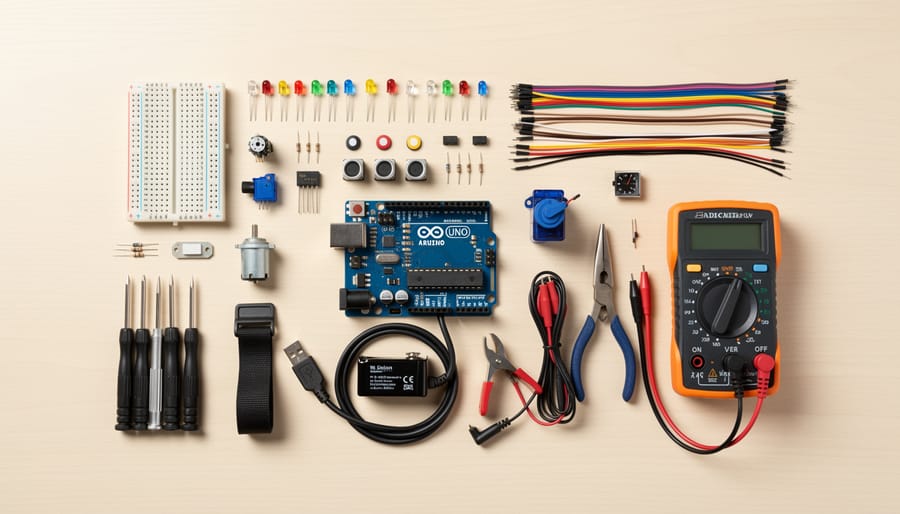
Essential Components and Tools to Get Started
Getting started with Arduino DIY projects doesn’t require a massive investment or an overwhelming collection of parts. Let’s break down the essentials you’ll need to begin your maker journey, along with some smart shopping strategies to keep costs manageable.
Your first decision involves choosing an Arduino board. The Arduino Uno remains the gold standard for beginners, offering excellent community support and compatibility with virtually every tutorial online. It strikes the perfect balance between capability and simplicity. If space is a concern for wearable or compact projects, consider the Arduino Nano, which packs similar functionality into a smaller footprint. For more ambitious projects requiring additional input/output pins, the Arduino Mega provides expanded capabilities without a steep learning curve.
Beyond the board itself, you’ll need a breadboard for prototyping circuits without soldering. These reusable platforms let you experiment freely and make mistakes without permanent consequences. Stock up on jumper wires in various lengths, both male-to-male and male-to-female configurations, to connect components effortlessly.
Your component starter kit should include LEDs in multiple colors, resistors in common values like 220Ω and 10kΩ, and push buttons for basic interaction. As you progress, sensors open up exciting possibilities. Temperature and humidity sensors, motion detectors, ultrasonic distance sensors, and light-dependent resistors are affordable entry points into creating responsive, smart projects.
Don’t overlook basic tools. A decent multimeter helps troubleshoot circuits, while wire strippers and needle-nose pliers prove invaluable for more permanent builds. A soldering iron becomes necessary when transitioning projects from breadboard to finished products.
Budget-conscious makers should consider starter kits, which bundle components at lower prices than buying individually. Online marketplaces offer affordable alternatives to name-brand parts, though quality varies. Expect to invest between thirty to sixty dollars for a comprehensive starter setup. Local makerspaces often provide access to tools and expertise, making them excellent resources for beginners exploring this exciting hobby.
Beginner-Friendly Arduino Projects
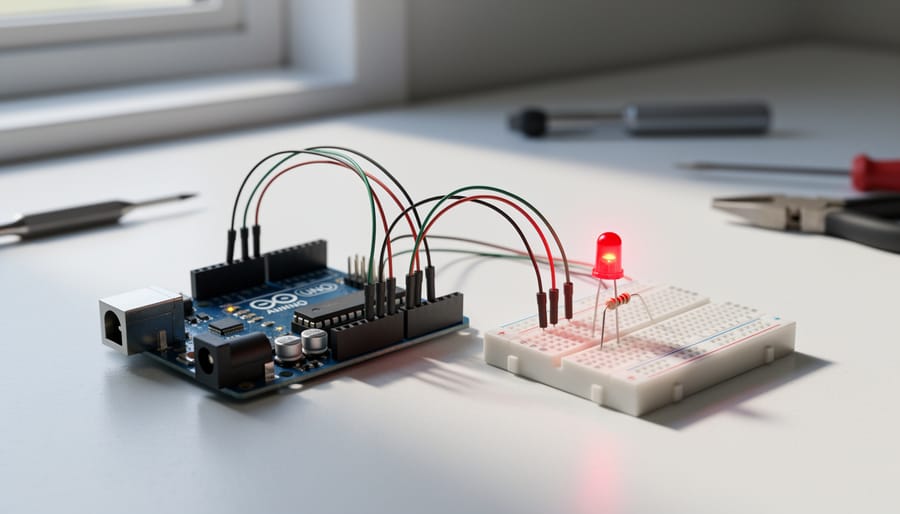
LED Blink and Pattern Control
Every Arduino journey begins with blinking an LED, and there’s good reason for this tradition. This simple project teaches you the fundamentals of programming, digital output control, and timing functions that you’ll use in virtually every future project. Connect an LED to pin 13 (most Arduino boards have a built-in LED here), add a resistor to protect it, and upload the basic blink sketch. Watch as your code brings hardware to life for the first time.
Once you’ve mastered the basic blink, it’s time to explore variations. Create custom patterns by adjusting delay times, or make multiple LEDs dance in sequence. A fantastic next step is building a traffic light simulator using red, yellow, and green LEDs. This project mirrors real-world timing systems and introduces you to managing multiple outputs simultaneously. You can even add a pedestrian crossing button using a digital input, combining two essential Arduino skills.
These LED projects might seem simple, but they’re building blocks for complex IoT applications. The same principles apply whether you’re blinking an LED or controlling smart home lighting systems. Take your time experimenting with different patterns and timing combinations to build confidence before moving forward.
Temperature and Humidity Monitor
Ready to dive into environmental monitoring? A temperature and humidity monitor is the perfect introduction to sensor-based projects and serial communication. This practical build uses the affordable DHT11 or DHT22 sensor to track your surroundings, making it ideal for greenhouse monitoring, home automation, or simply understanding your indoor climate.
The DHT sensor connects to your Arduino with just three pins: power, ground, and a data pin. You’ll need the DHT sensor library, which simplifies reading temperature and humidity values. The Arduino reads analog data from the sensor and converts it into human-readable numbers displayed on your serial monitor. Within minutes of uploading your code, you’ll see real-time environmental data streaming to your computer.
This project teaches fundamental concepts you’ll use in countless IoT applications. Serial communication lets your Arduino talk to computers and other devices, while sensor integration forms the backbone of smart home systems. Want to take it further? Add an LCD display for standalone operation, log data to an SD card for long-term tracking, or integrate multiple sensors throughout your space. The community has created countless variations, from weather stations to automated plant watering systems, all building on these core principles.
Motion-Activated Light
Ready to bring your home into the future? A motion-activated light is the perfect introduction to home automation and Internet of Things concepts. This project uses a PIR (Passive Infrared) sensor to detect movement and automatically control lighting, making it both practical and energy-efficient.
The PIR sensor detects changes in infrared radiation, which means it can sense when someone enters a room. Connect it to your Arduino along with a relay module to control standard household lights, or use LED strips for a simpler setup. You’ll need just a few components: an Arduino board, PIR sensor, relay module, and your chosen light source.
This project opens the door to understanding sensor integration and automated systems. Once you’ve mastered the basics, you can expand functionality by adding light sensors to prevent activation during daytime, or incorporate timing features to keep lights on for specific durations. Many community members have shared their variations, from bathroom lighting to garage security systems.
The beauty of this project lies in its real-world application. You’re not just learning to code; you’re solving everyday problems while reducing energy waste. It’s an excellent foundation for more complex IoT projects down the road.
Simple Alarm System
Ready to level up your Arduino skills while building something genuinely useful? A simple alarm system is the perfect project to explore how multiple components work together to create smart security solutions. This hands-on build teaches you essential programming concepts like conditional logic and handling multiple inputs simultaneously, skills you’ll use in countless future IoT projects.
Start with a PIR motion sensor as your primary detector, connecting it to your Arduino alongside an ultrasonic sensor for door monitoring. Add a piezo buzzer for audible alerts and an LED for visual indication. The beauty of this project lies in programming the Arduino to read both sensors continuously and trigger the alarm when movement is detected or when the door opens unexpectedly.
You’ll write code that checks sensor states, sets trigger thresholds, and controls output devices based on conditions you define. Try adding a keypad for arming and disarming your system, or integrate a delay timer to give yourself time to exit before activation. This project perfectly bridges the gap between basic single-component experiments and complex multi-sensor systems, making it an ideal stepping stone toward building comprehensive home automation solutions. Plus, you’ll gain practical experience with real-world security logic that professional systems use every day.
Intermediate Arduino Projects for Smart Homes
WiFi-Enabled Plant Watering System
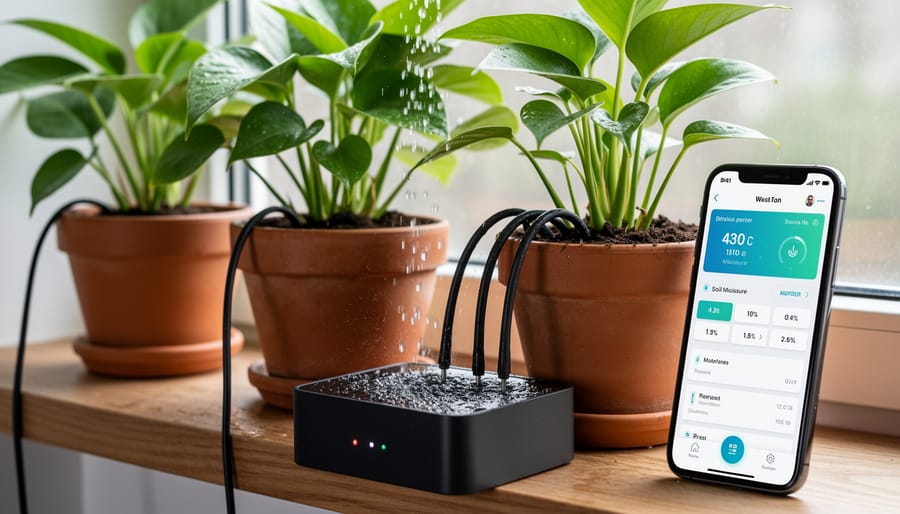
Ready to take your Arduino skills wireless? The WiFi-enabled plant watering system combines environmental sensing with internet connectivity, making it a perfect introduction to IoT automation. This project uses an ESP8266 or ESP32 microcontroller alongside capacitive soil moisture sensors to monitor your plants and trigger automated watering when needed.
The beauty of this system lies in its practical application. The soil moisture sensor continuously reads moisture levels in the soil, sending data to your ESP module. When readings drop below your set threshold, the system activates a small water pump or solenoid valve to deliver just the right amount of water. No more overwatering or forgotten plants.
What makes this project especially rewarding is the remote monitoring capability. By connecting your ESP module to WiFi, you can check soil moisture levels from anywhere using a smartphone app or web dashboard. Many makers use platforms like Blynk or MQTT to create simple interfaces that display real-time data and allow manual control when desired.
Getting started requires basic components: an ESP8266 or ESP32 board, a capacitive soil moisture sensor (more reliable than resistive types), a relay module, a small water pump, and tubing. The wiring is straightforward, and numerous open-source code examples are available to adapt for your specific needs.
This project scales beautifully too. Start with one plant, then expand to multiple sensors and zones. Add temperature and humidity sensors for comprehensive garden monitoring. The community has developed countless variations, from self-contained indoor systems to full greenhouse automation setups.
Smart Door Lock with RFID
Ready to upgrade your home security with some DIY ingenuity? A smart door lock using RFID technology is the perfect project to blend practical security with hands-on learning. This system replaces traditional keys with contactless RFID cards or tags, making access both convenient and secure.
At the heart of this project, you’ll use an RFID reader module (like the RC522) connected to your Arduino, which communicates with RFID tags through radio frequency signals. When you scan an authorized tag, the Arduino processes the unique ID, verifies it against stored credentials, and triggers a servo motor to physically unlock the door. Think of it as creating your own access control system, similar to what offices and hotels use.
The build process teaches fundamental security concepts like authentication and access logging. You’ll learn how the Arduino reads RFID tag data, compares it with pre-programmed authorized IDs, and controls the servo motor to rotate the lock mechanism. Adding features like an LCD display for status messages or LED indicators for access granted or denied makes the system more user-friendly.
For beginners, start with a basic prototype using a single authorized tag. As you gain confidence, expand functionality by storing multiple user IDs in EEPROM memory, adding real-time logging capabilities, or integrating with your existing smart home setup. The beauty of this project lies in its scalability – you can keep it simple or transform it into a sophisticated entry system with logging and remote notifications.
Weather Station with Display
Ready to level up your Arduino skills? A weather station project combines everything you’ve learned into one impressive, practical device that monitors real-world conditions right from your desk or window. This project perfectly demonstrates how multiple sensors work together to create something truly useful.
At its core, you’ll need a DHT22 or BME280 sensor for temperature and humidity readings, a BMP180 or BMP280 for barometric pressure, and optionally a rain sensor and anemometer for precipitation and wind speed data. The magic happens when you display all this information on a 16×2 LCD or OLED screen, transforming raw data into an easy-to-read weather dashboard.
Start simple with just temperature and humidity on a basic LCD display. The DHT22 sensor connects with just three wires, and the popular LiquidCrystal library makes programming straightforward. Once you’ve got basic readings displaying, add the pressure sensor using I2C communication, which only requires two additional pins.
The beauty of this project lies in its expandability. Begin with current conditions, then add features like minimum and maximum temperature tracking, trend indicators showing whether pressure is rising or falling, or even custom weather icons on OLED displays. Many makers in the Arduino community share their code and display layouts, making it easy to find inspiration and troubleshooting help.
For those wanting to go further, integrate WiFi capability with an ESP8266 module to log your data online or create a companion mobile app. You could even build multiple sensor nodes around your property, creating a hyperlocal weather monitoring network. This project beautifully bridges the gap between simple Arduino experiments and professional-grade IoT applications, giving you skills applicable to countless future builds.
Advanced Arduino Projects for IoT Enthusiasts
Home Energy Monitoring Dashboard
Understanding your home’s energy consumption has never been more accessible thanks to Arduino and IoT technology. A home energy monitoring dashboard lets you track electricity usage in real-time, helping you identify energy-hungry appliances and reduce your monthly bills while contributing to environmental sustainability.
This project centers around current sensors like the ACS712 or SCT-013, which measure the electrical current flowing through your home circuits. These non-invasive sensors connect to your Arduino, which processes the data and calculates power consumption. The real magic happens when you integrate cloud platforms like ThingSpeak or Blynk, transforming raw numbers into beautiful, accessible dashboards you can check from anywhere.
For beginners, start with monitoring a single appliance or circuit. You’ll need an Arduino board (Uno or ESP8266 for built-in WiFi), a current sensor, and some basic wiring skills. The ESP8266 or ESP32 boards are particularly popular for this project since they offer WiFi connectivity without additional shields.
ThingSpeak provides free data logging with visualization tools perfect for tracking trends over days or weeks. Blynk offers a more interactive experience with mobile app control and customizable widgets. Both platforms have Arduino libraries that simplify the coding process, making this project achievable even if you’re relatively new to programming.
The community around energy monitoring projects is vibrant and helpful, with countless tutorials and ready-made code examples available. Once your basic system is running, you can expand it to monitor multiple circuits, add alerts for unusual consumption patterns, or integrate with other smart home systems.
Voice-Controlled Home Automation Hub
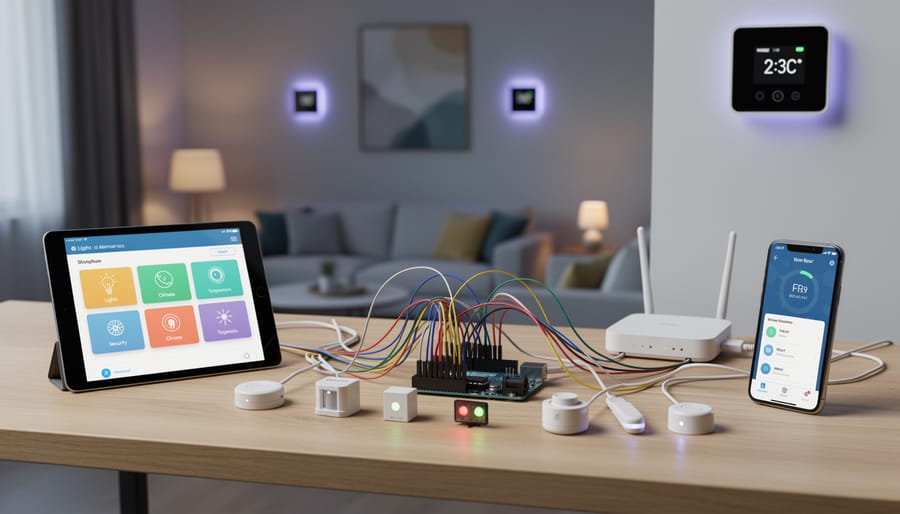
Imagine walking into your home and simply saying “turn on the lights” or “set the thermostat to 72 degrees” – and watching your Arduino-powered devices spring into action. Building a voice-controlled home automation hub combines the accessibility of Arduino with the convenience of modern voice assistants, creating a truly smart home experience that you’ve built yourself.
This project introduces you to two powerful communication protocols that form the backbone of IoT systems: MQTT (Message Queuing Telemetry Transport) and API integration. Don’t let the technical terms intimidate you – MQTT is essentially a lightweight messaging system that lets your devices talk to each other efficiently, while APIs act as bridges connecting your Arduino to voice platforms like Amazon Alexa or Google Home.
To get started, you’ll need an Arduino board with WiFi capability (the ESP8266 or ESP32 works wonderfully here), relay modules to control your devices, and accounts with your chosen voice assistant platform. The basic workflow is straightforward: your voice command travels to the cloud service, which sends a message through MQTT to your Arduino, which then triggers the appropriate relay to control your device.
Begin with a single device – perhaps a lamp or fan. Set up an MQTT broker (free options like Mosquitto are perfect for learning), configure your Arduino to subscribe to specific topics, and create a simple skill or action in your voice assistant’s developer console. Once you’ve mastered this foundation, scaling up to control multiple devices becomes surprisingly manageable.
The beauty of this project lies in its expandability. Start simple, test thoroughly, and gradually add more devices to your network. Many makers in the community have shared their configurations and troubleshooting tips, making this an excellent collaborative learning opportunity. You’re not just building a gadget – you’re creating a customizable smart home ecosystem that grows with your skills and needs.
Tips for Successful Arduino DIY Projects
Success with Arduino projects comes down to good planning, smart troubleshooting, and tapping into the vibrant maker community. Here are essential tips to help your projects go smoothly from concept to completion.
Start by organizing your workspace and components. Use labeled bins or compartments to sort resistors, LEDs, sensors, and jumper wires. This simple step saves hours of frustration when you’re deep into a build. Keep a well-stocked toolkit with basics like wire strippers, multimeter, and breadboards of various sizes.
When prototyping, always test components individually before integrating them into complex circuits. This modular approach makes troubleshooting much easier. If something doesn’t work, you’ll know exactly which component is causing issues rather than debugging an entire system at once.
Code organization matters more than you might think. Comment your code generously, explaining what each section does. Break complex programs into functions with clear names. This practice helps when you revisit projects months later or when sharing code with others. Start with working example sketches from the Arduino IDE, then modify them gradually to understand how changes affect behavior.
For component selection, don’t automatically choose the cheapest option. Quality sensors and reliable power supplies prevent mysterious failures. Check voltage and current requirements carefully, as mismatched specifications cause most beginner problems.
Safety should never be an afterthought. When working with mains voltage or high-current projects, double-check connections and use appropriate enclosures. Always disconnect power before making circuit changes.
The Arduino community is your greatest resource. The official Arduino forums and Reddit’s Arduino community offer helpful troubleshooting advice. Websites like Instructables and Hackster.io provide thousands of documented projects with code and schematics. Don’t hesitate to ask questions; the maker community thrives on helping newcomers succeed.
Document your projects with photos and notes as you build. This creates a valuable reference for future work and allows you to share your accomplishments with others, contributing back to the community that supports your learning journey.
Taking Your Arduino Projects to the Next Level
Once you’ve mastered the basics and completed a few starter projects, you’re ready to transform your temporary breadboard builds into polished, permanent creations. Taking your Arduino projects to the next level involves several exciting pathways that can dramatically improve functionality and presentation.
Consider designing custom PCBs (printed circuit boards) for projects you plan to use long-term. Software like KiCad or EasyEDA makes PCB design accessible even for beginners. A custom board eliminates tangled wires, reduces your project’s footprint, and gives it a professional finish. Many online services offer affordable PCB manufacturing with quick turnaround times.
3D printing opens another dimension of customization. Design and print custom enclosures that perfectly fit your components while adding weather protection for outdoor installations. Platforms like Thingiverse and Printables offer thousands of free Arduino enclosure designs you can modify or use as inspiration.
Integration with larger IoT ecosystems amplifies your project’s capabilities. Connect your Arduino creations to platforms like Home Assistant, MQTT brokers, or cloud services such as Blynk and Arduino IoT Cloud. This connectivity enables remote monitoring, automation rules, and seamless interaction with other smart devices in your home.
The Arduino community thrives on collaboration and knowledge sharing. Document your projects thoroughly and share them on platforms like Instructables, Hackster.io, or GitHub. Include clear photos, wiring diagrams, and well-commented code. Engaging with the community not only helps others but often leads to valuable feedback and new ideas for improvements.
Join online forums, local maker spaces, or Arduino meetups to connect with fellow enthusiasts. Collaborative projects often push creative boundaries further than solo efforts, and teaching others reinforces your own understanding. Remember, every expert started as a beginner, and your unique perspective contributes value to the maker community.
The world of Arduino DIY projects is yours to explore, and the best part? You don’t need to be an expert to get started. Whether you’re attracted to building a simple LED circuit or dreaming of creating a fully integrated smart home system, Arduino makes it possible. The beauty of this platform lies in its accessibility—with affordable components, countless free resources, and straightforward programming, anyone can bring their ideas to life.
Start small. Pick a beginner-friendly project that excites you, gather your components, and dive in. Don’t worry about making mistakes—they’re part of the learning process. Each project you complete builds your confidence and skills, opening doors to more ambitious creations.
Remember, you’re not alone on this journey. The IoT hobbyist community is vibrant, welcoming, and always ready to help. Online forums, social media groups, and maker spaces are filled with enthusiasts eager to share knowledge, troubleshoot problems, and celebrate your successes.
The transformative potential of Arduino extends beyond individual projects—it’s about developing problem-solving skills, understanding technology, and empowering yourself to create solutions that matter to you. So grab your Arduino board, embrace curiosity, and start building. Your next great project is waiting.